There's a quiet elegance in the precision of electronics, a hidden world of connections and currents that hum with potential. Within this landscape, the choice of wiring becomes a subtle art, and understanding the role of REM wire in amplified circuits takes on a particular significance.
Imagine the clean lines of a perfectly designed circuit, where every component plays its part in harmony. This is where the discussion of REM wire, or Remote Turn-On wire, in amplified circuits begins. Its purpose is seemingly simple, yet its influence on the overall system is profound. It acts as the conductor, not of audio signals, but of the power that breathes life into the amplifier, allowing for synchronized operation with other components.
The genesis of REM wire's use lies in the desire for streamlined control and efficiency. Before its widespread adoption, amplifiers often required manual switching, a clunky process that lacked the elegance of a unified system. REM wire changed this by allowing a head unit, for instance in a car audio setup, to remotely activate the amplifier, eliminating the need for separate switches and simplifying the user experience.
The significance of using REM wire correctly is paramount. An improper connection can lead to a range of issues, from minor inconveniences like persistent battery drain, to more serious problems such as damage to the amplifier or other connected devices. Therefore, understanding its function and proper implementation is crucial for anyone working with amplified circuits.
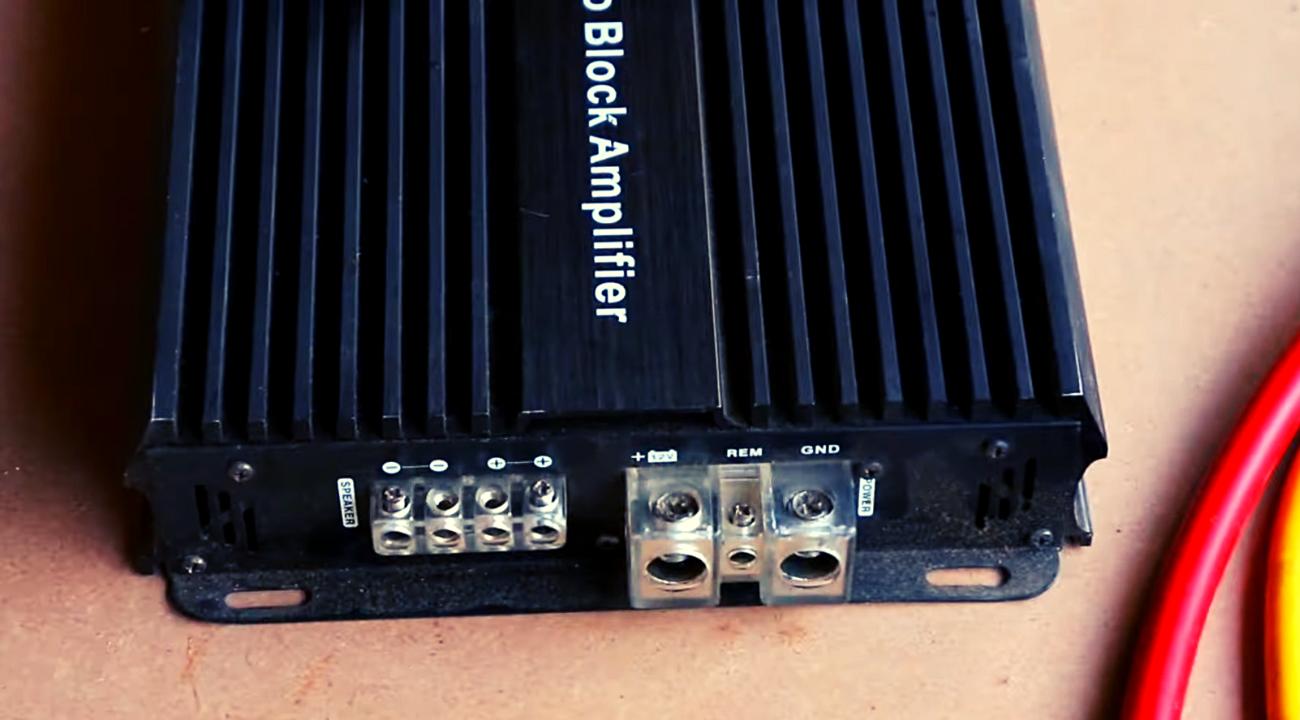
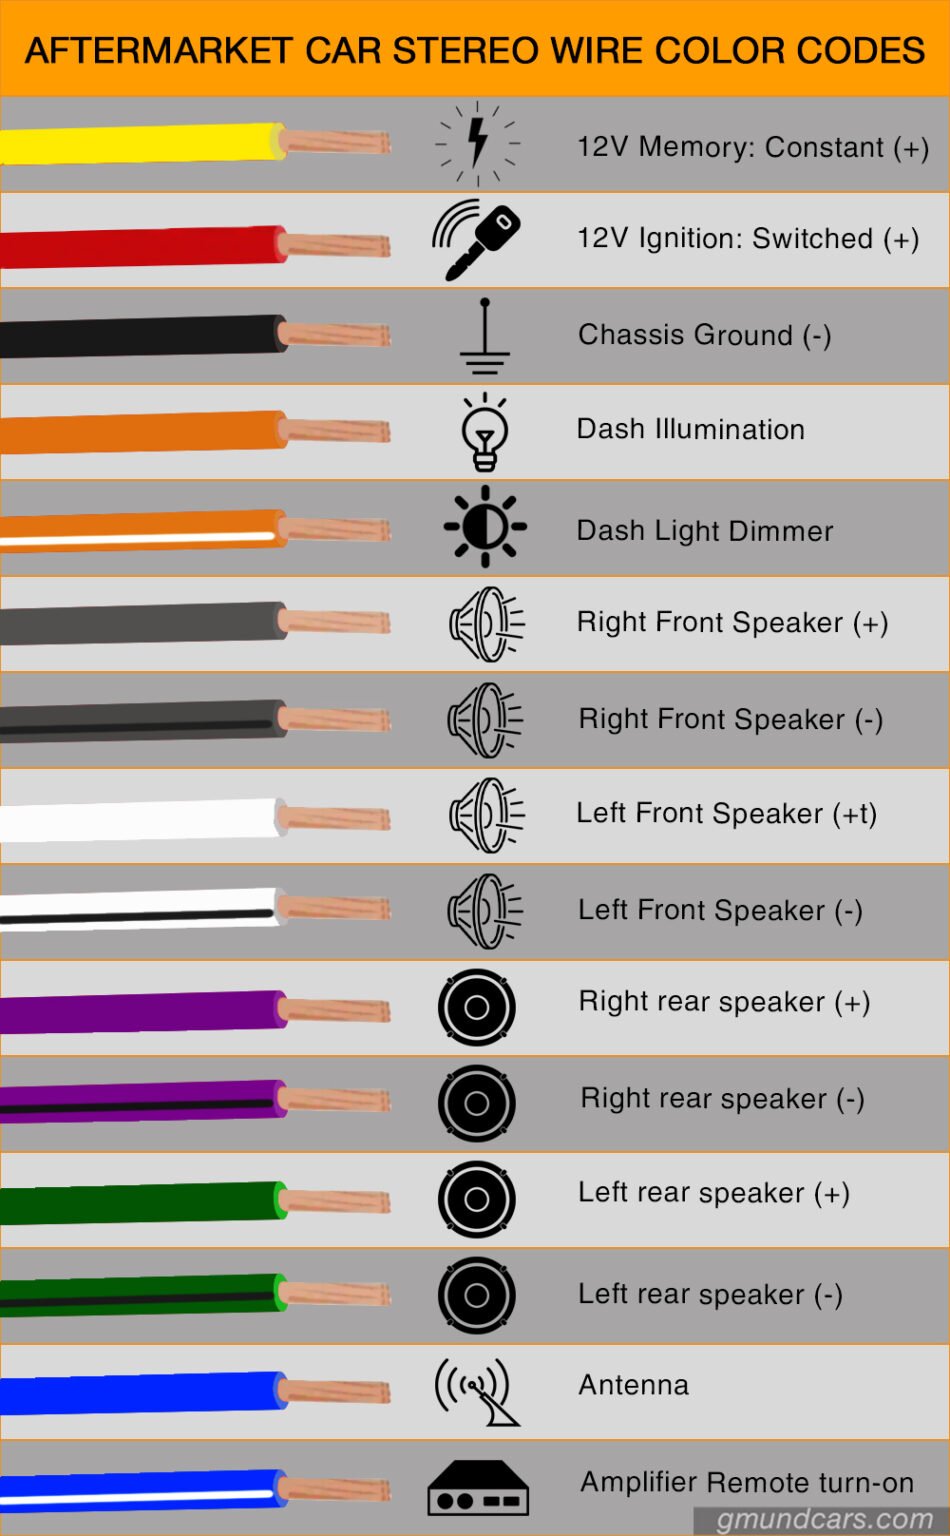
Essentially, REM wire carries a low-voltage DC signal from the head unit to the amplifier's remote terminal. This signal acts as a trigger, switching the amplifier on or off in sync with the head unit. This seemingly small detail contributes significantly to the overall efficiency and user-friendliness of the system.
Let's delve deeper into the advantages this seemingly simple wire offers. Firstly, it simplifies system operation. No more fumbling with multiple switches; the amplifier powers up automatically when the head unit is turned on. Secondly, it enhances energy efficiency. The amplifier only draws power when needed, minimizing battery drain. Finally, it contributes to a cleaner, more organized installation, eliminating unnecessary wiring and switches.
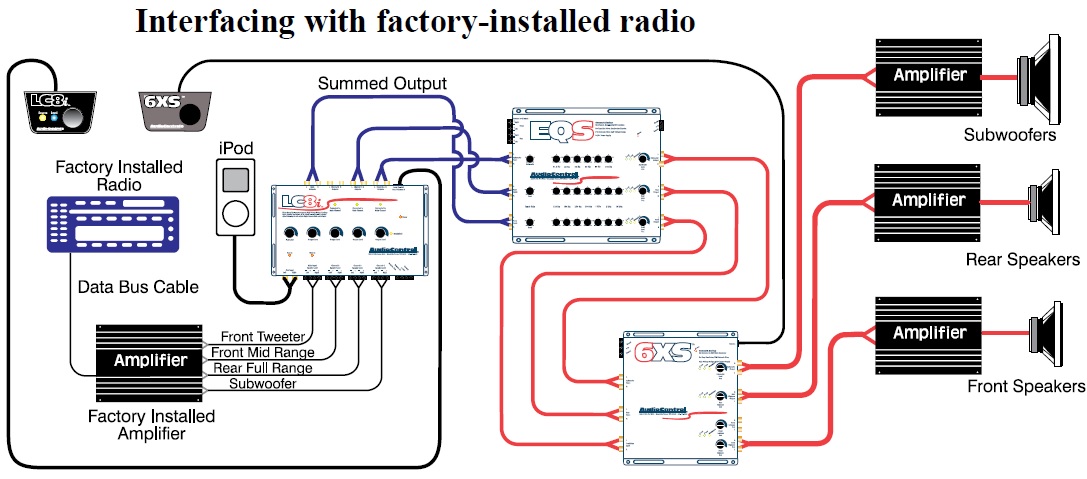
Implementing REM wire correctly involves connecting it from the remote output terminal of the head unit to the remote terminal of the amplifier. Ensuring proper gauge and secure connections is crucial for reliable operation.
Advantages and Disadvantages of Using REM Wire
| Advantages | Disadvantages |
|---|---|
| Simplified system operation | Potential for incorrect wiring leading to malfunctions |
| Improved energy efficiency | Requires a dedicated wire run |
| Cleaner installation | Can be susceptible to noise interference if not properly shielded |
Best Practices for REM Wire Implementation:
1. Use the correct gauge wire for the amplifier's current draw.
2. Ensure secure connections at both the head unit and amplifier.
3. Route the wire away from potential sources of noise interference.
4. Use a fuse near the amplifier's remote terminal for protection.
5. Double-check all connections before powering on the system.
Frequently Asked Questions about REM Wire:
1. What gauge wire should I use for REM? - It depends on the amplifier, but 18-20 gauge is generally suitable.
2. Can I use any wire for REM? - It's recommended to use wire specifically designed for low-voltage DC signals.
3. What happens if the REM wire is disconnected? - The amplifier will not turn on.
4. Can I connect multiple amplifiers to a single REM wire? - Yes, using a distribution block.
5. What if my head unit doesn't have a dedicated REM output? - Some adapters can create a REM signal.
6. How do I troubleshoot REM wire issues? - Check for loose connections, blown fuses, and continuity.
7. Can I use a switched 12V source instead of REM? - It's not recommended, as it can cause issues with the amplifier's operation.
8. What if my amplifier turns on but doesn't produce sound? - This could indicate a separate issue unrelated to the REM wire.
Tips and Tricks: Label your REM wire clearly to avoid confusion during installation. Use a multimeter to test for continuity and ensure the signal is reaching the amplifier.
In the intricate world of amplified circuits, the seemingly humble REM wire plays a crucial role, orchestrating the power flow and enabling a seamless user experience. Its proper implementation contributes not only to the functionality of the system but also to its overall efficiency and longevity. From simplifying operation to enhancing energy conservation, the benefits of utilizing REM wire correctly are clear. By understanding its function, adhering to best practices, and troubleshooting potential issues, you can harness the full potential of your amplified system, ensuring a harmonious blend of power and precision. Understanding the nuances of integrating REM wire into your AMP setup is a crucial step toward achieving a truly optimized and efficient audio system. By taking the time to understand its function and best practices, you're not just connecting wires, you're crafting an experience. Embrace the subtleties, and you'll unlock a world of refined audio performance.
Deciphering public holiday regulations whats permitted on feiertage
Navigating texas workforce commission payroll reporting
Unveiling the secrets of los lunares de tu cuerpo entero
Pac On Head Unit Rca Wiring - Khao Tick On
12 Gauge Wire Amp Rating How Many Amps Do They Handle - Khao Tick On
Speaker For Car Audio Installation at Portia Hawkins blog - Khao Tick On
Upgrading the Bose Subwoofer - Khao Tick On
piggyback ampsREM turn on wire - Khao Tick On
What Does Rem Mean On an Amplifier Understanding Rem on Amplifier - Khao Tick On
Replacement Radio For A 2011 Chevy Tahoe - Khao Tick On
Car Audio Wiring Diagram Software - Khao Tick On
125 Amp Wire Size Calculator Chart 0 - Khao Tick On
Demystifying Amp Remote Wire Gauge for Car Stereos - Khao Tick On
Rem Amplifier Wiring Diagram - Khao Tick On
Motor Wiring Color Codes - Khao Tick On
Speaker Wire To Amplifier Cable at Susan Sipes blog - Khao Tick On
rem wire on amp - Khao Tick On
Wiring Diagram Car Stereo Amplifier - Khao Tick On


